Thursday, November 12, 2009

Tweaking AddThis Button's position for Blogger

The code provided by AddThis allowed the button to be placed at the bottom of each blog posts. But I did not like the location, I wanted it to be aligned nicely on the right hand side of the "comments" link.

While I quickly figured out how to move the button to the position, the vertical alignment of the button was off by a few pixels. Being not so familiar with CSS, it took me a long time to finally solve this issue.


Step 1
Get the code from AddThis

Step 2
In Blogger, go to Layout > Edit HTML, and paste the code immediately below these lines:
<!-- quickedit pencil -->
<b:include data='post' name='postQuickEdit'/>


Step 3
To make the button align with the elements in footer, change the code below...
<!-- AddThis Button BEGIN -->
<div><a expr:addthis:title='data:post.title' expr:addthis:url='data:post.url' class='addthis_button'><img src="http://s7.addthis.com/static/btn/v2/lg-share-en.gif" width="125" height="16" alt="Bookmark and Share" style="border:0"/></a>
<script type="text/javascript" src="http://s7.addthis.com/js/250/addthis_widget.js#pub=edwinliu"></script></div>
<!-- AddThis Button END -->


...to this:
<!-- AddThis Button BEGIN -->
<span><a expr:addthis:title='data:post.title' expr:addthis:url='data:post.url' class='addthis_button'><img src="http://s7.addthis.com/static/btn/v2/lg-share-en.gif" width="125" height="16" alt="Bookmark and Share" style="border:0;padding:0 5px;vertical-align:text-bottom;"/></a>
<script type="text/javascript" src="http://s7.addthis.com/js/250/addthis_widget.js#pub=edwinliu"></script></span>
<!-- AddThis Button END -->

Wednesday, November 11, 2009

AJAX Powered Google Image Search

I just noticed something, Google's image search is now running on AJAX!
It means that when you click the "next" button, the images will be updated immediately, so you no longer need to wait for the whole page to reload & refresh.

A small but super convenient change.

Tuesday, November 10, 2009

Create round corners in photoshop

How to create round cornered rectangles in Photoshop - a more flexible and "tweaking-friendly" way than using the rounded rectangle tool

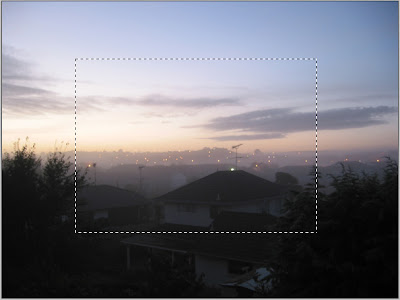
Here's the picture we want to add round corners to:


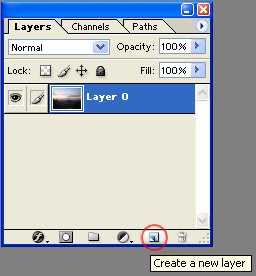
1. click create a new layer (we'll call this new layer Layer1 from now on)


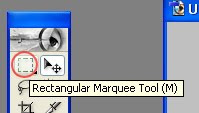
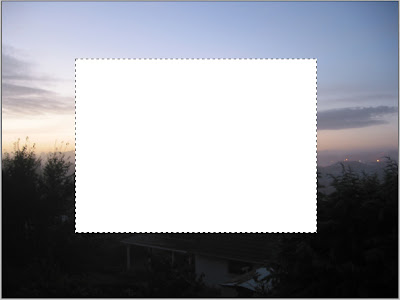
2. rectangular marquee > draw a rectangle on Layer1 > fill it with any color you like


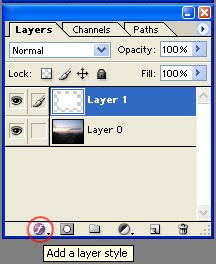
3. Add a Layer Style > Stroke


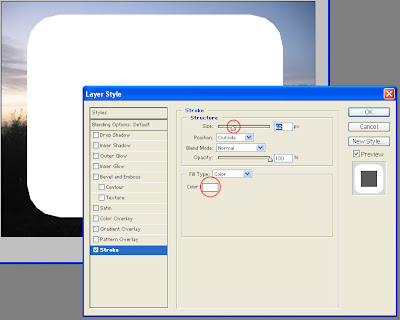
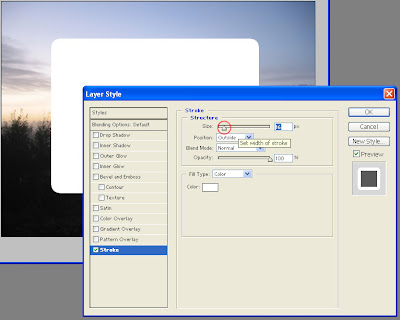
4. Change the color of the stroke; then change the stroke width


5. Adjust the stroke width to your liking, then click OK


Add Tweet This to Blogger

While searching for a tweeter button as shown on the right hand side of this post, I've checked out several tutorials on the web, and the solution from the link below is probably the easiest & prettiest one I've seen.

Add Tweet This and Retweet To Blogger Posts


Monday, November 9, 2009

How to backup data to DVD and find them later with ease

"Which DVD did I backup my file to?" I have certainly, for many times in the past, stared at a pile of CD/DVDs, scratched my head and for the life of me couldn't figure out where a particular file went.

Eventually I found a simple solution that works for me. Basically, every time I burn a DVD, I'd use a Python script to create a text file with the same name as the DVD label, and this file will record all the file names/directories on that DVD.

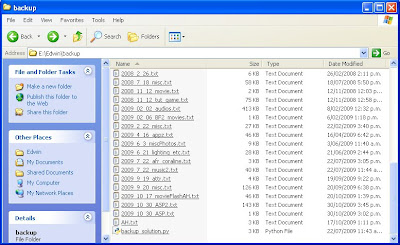
I put all these files in a folder, and this is what it looks like:


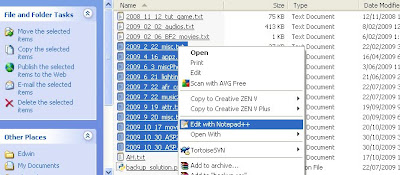
Every time I need to find a file, I would select a bunch text files, and open them all in Notepad++


In Notepad++, I would go to: "Search > Find" (or press: Ctrl + F), type in the file name, click "Find All in All Opened Documents", and voila! In seconds I could find out which DVD has the file I wanted.


Step-by-step guide:

Required downloads:
1. download and install python (current version 2.6.4, ~14mb)
2. download and install notepad++ (my favourite text editor, ~3.4 mb), or any other text editor that allows you to search for keywords in multiple files.
3. download and save the python script to your hard drive:
backup_solution.py

Create content text files for DVDs:

1. create a folder in your hard drive to store backup information. (I'll use C:/mybackup as the example directory from now on)

2. put the python script "backup_solution.py" into the folder created in 1.

3. Open backup_solution.py with a text editor, scroll down to the bottom of the file, go to line #66:
# Edit the following 2 lines
xpath = "G:/"
output = "content.txt"

4. change xpath to the path of your DVD drive (mine is "G:/"). eg. If your DVD drive is D, change the line to:
xpath = "D:/"

5. save and close backup_solution.py

6. burn your files to DVD as usual.

7. When the DVD burning is done, don't remove it from the drive just yet. With the DVD in the drive, double-click backup_solution.py, the script will now search your DVD and write all the file and folder names into a file called content.txt and place it in C:/mybackup.

8.1 change the name of content.txt to be the same as the label of your DVD. I will often name my DVD using the date + a short description. eg. "2009_10_19_videos.txt", "2009_11_9_photos.txt".

8.2 Alternatively, you can change the following line in backup_solution.py before running step 5:
output = "2009_11_9_photos.txt"

A Handy Tip:
When viewing the text files generated by the script in Notepad++, you can go to: top panel > language > python; then go to: View > Fold All (or press Alt + 0). Now you can click the [+] or [-] sign next to the paths to expand/collapse the file lists.


Final Note:

If you know Python, feel free to customize the script to create more advanced outputs.