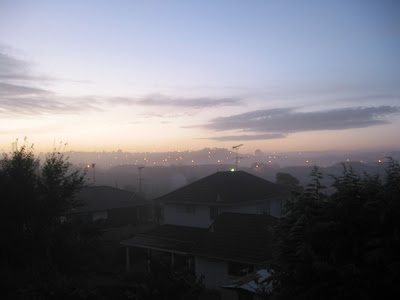
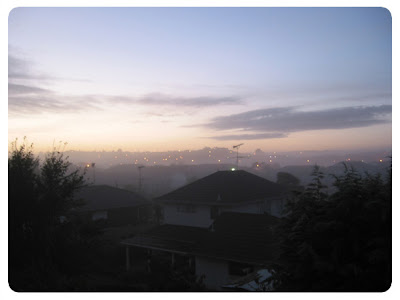
Here's the picture we want to add round corners to:
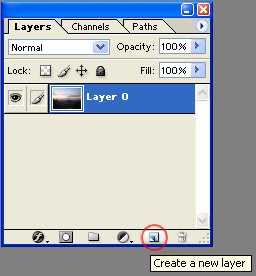
1. click create a new layer (we'll call this new layer Layer1 from now on)
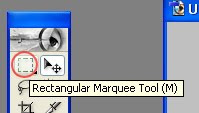
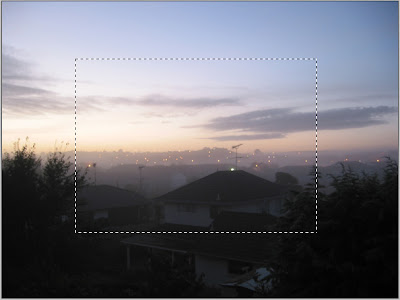
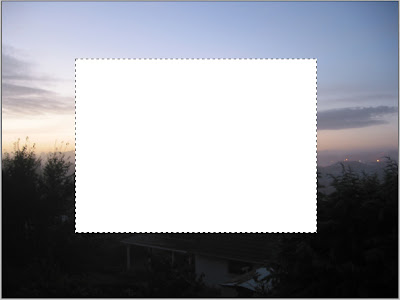
2. rectangular marquee > draw a rectangle on Layer1 > fill it with any color you like
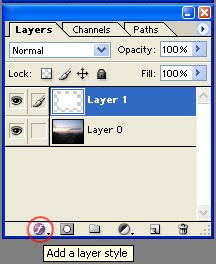
3. Add a Layer Style > Stroke
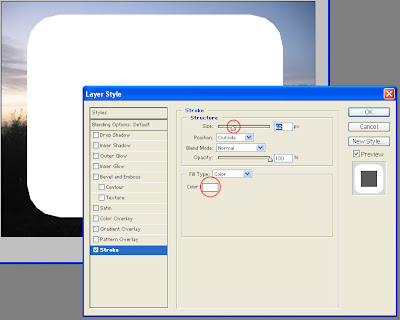
4. Change the color of the stroke; then change the stroke width
5. Adjust the stroke width to your liking, then click OK
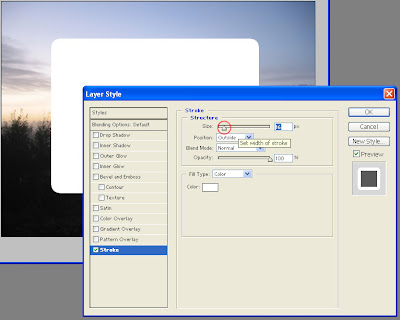
6. Press "Ctrl + T" (or Top panel > Edit > Free Transform); adjust the size of the rectangle to your liking.
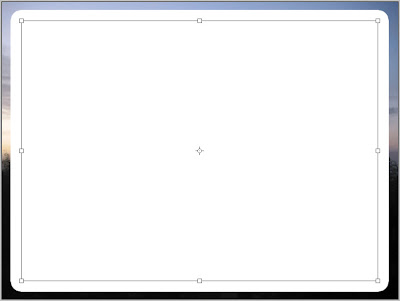
7. Create another new layer
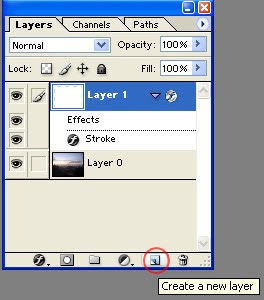
8. Select both Layer 1 and 2, press "Ctrl + E" to merge them. This will make the stroke effect permanent (and un-editable from now on).
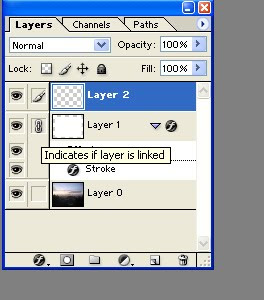
9. Ctrl > left-mouse-click on the thumbnail area of the merged layer
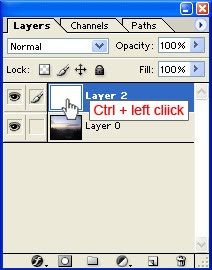
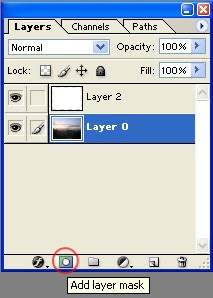
10. Left click on the picture layer, then click "Add Layer Mask"
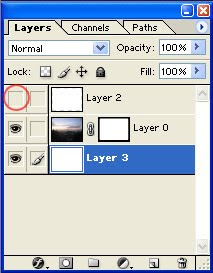
11. Turn off the visibility of Layer2, and Voila. Now you have a rectangle picture with rounded corners. You can then create a new layer (layer 3 in this image), fill it with any color, and place it underneath the picture layer.
Afterthoughts:
The most popular way for creating round corners seems to be using the "rounded rectangle tool" as shown in the link here. But I find that using Layer Style > Stroke allowed me to edit and tweak the shape much more easily. If I keep a copy of the "rectangle layer" with layer style still active (ie. Layer 1 in step 7), I can go back, edit the shape, and change the rounded corner size any time I want.

Edwin can you show us how you went from having a rectangle to a rounded rectangle layer. Between step 3 & 4 you failed to mention how you modified the corner radius in PS. Also in your afterthoughts you said, "If I keep a copy of the "rectangle layer" with layer style still active (ie. Layer 1 in step 7), I can go back, edit the shape and change the rounded corner size any time I want." But how is this acheived? Good tutorial as I followed it and it does work but I was lost after step 3 not knowing how you were able to make the "rectangular marquee tool" have rounded corners. Please clarify this for us. :-)
ReplyDelete2A. At step 2, make sure you've selected the new layer you created in step 1 (ie. Layer 1)
ReplyDelete2B. then you use the rectangle marquee tool to draw a rectangle on layer 1
2C. fill the rectangle marquee with any color you like, (either use the "paint bucket tool G", or the short cut "Ctrl+ backspace") now you have a normal rectangle on layer 1. We will only add the round corners at step 4.
3A. with layer 1 selected, click the "add a layer style" button, and choose "stroke"
4A. Now if you increase the stroke size, you will see a border being added to your rectangle, with round corners.
4B. If you don't see the round corners at 4A, make sure the "Position" parameter is set to "outside" or "center".
So in summary, we are not adding the round corners to the rectangle marquee, instead, we paint a normal rectangle, then use the "stroke" effect to add a border with round corners.
I hope this clarifies the your question, let me know if you still got questions :)
There's an even better, simpler way of doing this.
ReplyDelete1. File > New
2. Select the "Rounded Rectangle Tool"
3. Select the "Fill Pixels" icon below the main menu (specifically under the "Image" menu title)
4. File > Place (choose photo to modify)
5. Layer > Rasterize > Layer
6. Create a new layer and name it "Layer 1"
7. With the "Rounded Rectangle Tool" selected and the corner radius specified, draw your rectangle over the photo so that it will reflect the exact cutout you are wanting. (make sure you draw the shape while in "Layer 1")
8. Select the "Magic Wand Tool" and click the image ouside "Layer 1" so that it is actively selected with dotted lines rotating around the image.
9. In the layers panel click on "Layer 1" and then click on the trash can icon in the same panel to delete "Layer 1".
10. You should see the photo layer with the active dotted lines still rotating the image. PRESS DELETE. That's it. The image should now be cut out and have rounded corners.
Hi, yes the "rounded rectangle tool" seems to be what everybody's using, but it doesn't allow you to adjust the corner radius quickly. The benefit of using stroke is that you can tweak the corner radius and see the change before settling with the radius you want. So it's what I prefer, but of course different people will have different preferences.
ReplyDeletespmething wrong is explained in points 7 and 8 cause the way I read it does not merg... 9 and 10 won't work... and why it must cost 20 moves to make simply thing..
ReplyDeletePDV TV: where is point 2?? Rounded React.. Tool? I have Reavtu Marqua Tool so please be precisious...
ReplyDeleteHi, if you want to take the Rounded Rectangle approach, there's a link in the afterthoughts section. Alternatively, here's the url below:
ReplyDeletehttp://matthom.com/archive/2004/09/10/fast-rounded-corners-in-photoshop
ps. for step 8, if you are using newer version of photoshop, just select one layer first, then Shift + left click on another layer to select both. Then you can use Ctrl + E shortcut to merge them.
ReplyDeleteHi, I am Anonymous from previous two posts. I figure out how to make this transformaton so that you can cacel my posts.
ReplyDeleteYou cut out the picture from the middle and I did the same = it works. there is a problem if you want to round (or smooth) the corners of oryginal picture withouth losing one pixel of width and lenght. Pnt4 wont work as you cant strike outside cause your with the boarder of the picture. So I made it this way:
1.Made a new layer 1 (oryginal layer becomes Layer 0) Press Ctrl Backspace or Shift+F5 to paint the background with the colour you like. mark out Layer 1
2. Go back to oryginal picture Layer 0. Use Rectangular Marquee Tool to draw rectangular on the picture. HERE GOES THE TIP! if you draw exactly with the border Refine Edge functions won't work so drawing rectangular try to lose just one pixel from the width and lenght of oryginal size(or up to user). Now right click mouse one the picture> Refine Edge: here you can play with Radius and Smooth for the shape of corners and other funcions for some extra efects. After your done press OK
3. Copy this with Ctrl C and paste it to Layer1 Automaticly PS will ceate Layer2. Mark togeter with Layer1(background) and SAVE YOUR PROJECT.
is it good?
can You tell me how to remove background. I wanna only rounded image as it is.
ReplyDeleteHi, to remove the background, double click it in the layer editor, click ok to make it into a new layer, then drag it into the rubbish bin.
ReplyDeleteI'm able to follow all the step up until step 10. I've merged in step 9, but when I left click on the picture layer it won't let me add a layer mask. It's grayed out. Perhaps I did something wrong? I'm using photochop CS4. Please advise...
ReplyDeletehi my guess is that in layer editor your picture layer has a padlock icon, which means it is a "background" object. What you'll need to do is to double click it, a "new layer" dialog will pop up, if you click ok this will transform the "background" object into a "layer" object.
ReplyDeleteNow if you highlight it, the add layer mask button should be activated.
I hope this helps, let me know if you are still having problem. Cheers
When I use the paint bucket to fill the selection in step 2 it doesn't fill the entire thing, only blotches.
ReplyDeletemake sure you use the paint bucket on a new layer, not the image layer
ReplyDeleteGot it! One last question: Step 11 you say create a new layer, but how do you fill it, then place it behind the image?...Can you give more detailed description of that last step please?
ReplyDeleteMy hugest thanks to you!!!
ReplyDelete